The BristleBot / Vibro-Bug
Build a fun, no-coding tiny vibrobot that skitters across tables using an angled toothbrush head, a vibrating coin motor, and a 3V coin cell battery.
The quintessential first step into robotics! The BristleBot teaches fundamental physical mechanics, simple DC series circuits, vibration harmonics, and center-of-gravity weight distribution. Slanted nylon bristles convert high-frequency 10,000 RPM eccentric motor vibrations into directional forward thrust with zero software or soldering required.
Bill of Materials (BOM) & Hardware Components
| Component | Specifications | Qty | Approx Cost |
|---|---|---|---|
| Slanted-Bristle Toothbrush Head | Cut-off brush head with uniformly rear-slanted nylon bristles | 1 | $1.00 |
| Micro Vibrating Pager Motor (Disc / ERM) | 3V DC, 10,000 RPM eccentric rotating mass vibration motor | 1 | $1.50 |
| CR2032 3V Lithium Coin Cell Battery | 3.0V nominal, 220mAh lightweight power source | 1 | $0.80 |
| Heavy-Duty Double-Sided Foam Tape | Vibration-dampening high-adhesion structural foam | 1 | $0.50 |
| Mini Slide Switch / Paperclip Jumper | Direct circuit contact to engage/disengage motor | 1 | $0.30 |
Electrical & System Architecture
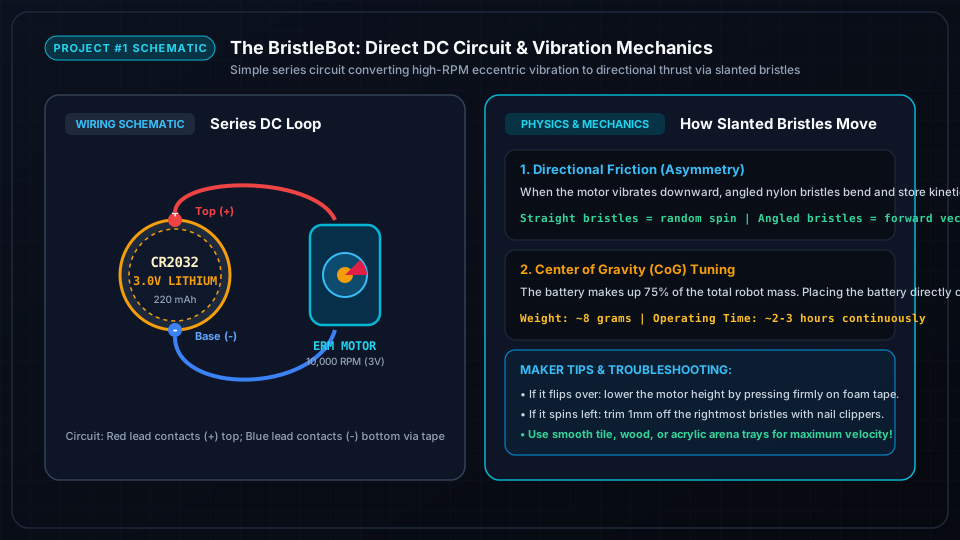
A pure direct-current series loop: the positive (+) red lead of the 3V coin vibration motor touches the top positive face of the CR2032 coin battery; the negative (-) blue lead contacts the bottom negative face to complete the circuit and spin the internal eccentric mass.
Step-by-Step Assembly & Configuration Tutorial
Follow each milestone step with photos, wiring checks, and testing procedures.
Cutting and Preparing the Angled Toothbrush Head
Using wire cutters, diagonal snips, or a fine hobby saw, sever the handle off an angled-bristle toothbrush right at the base of the head. Clean off any sharp plastic burrs with fine sandpaper.
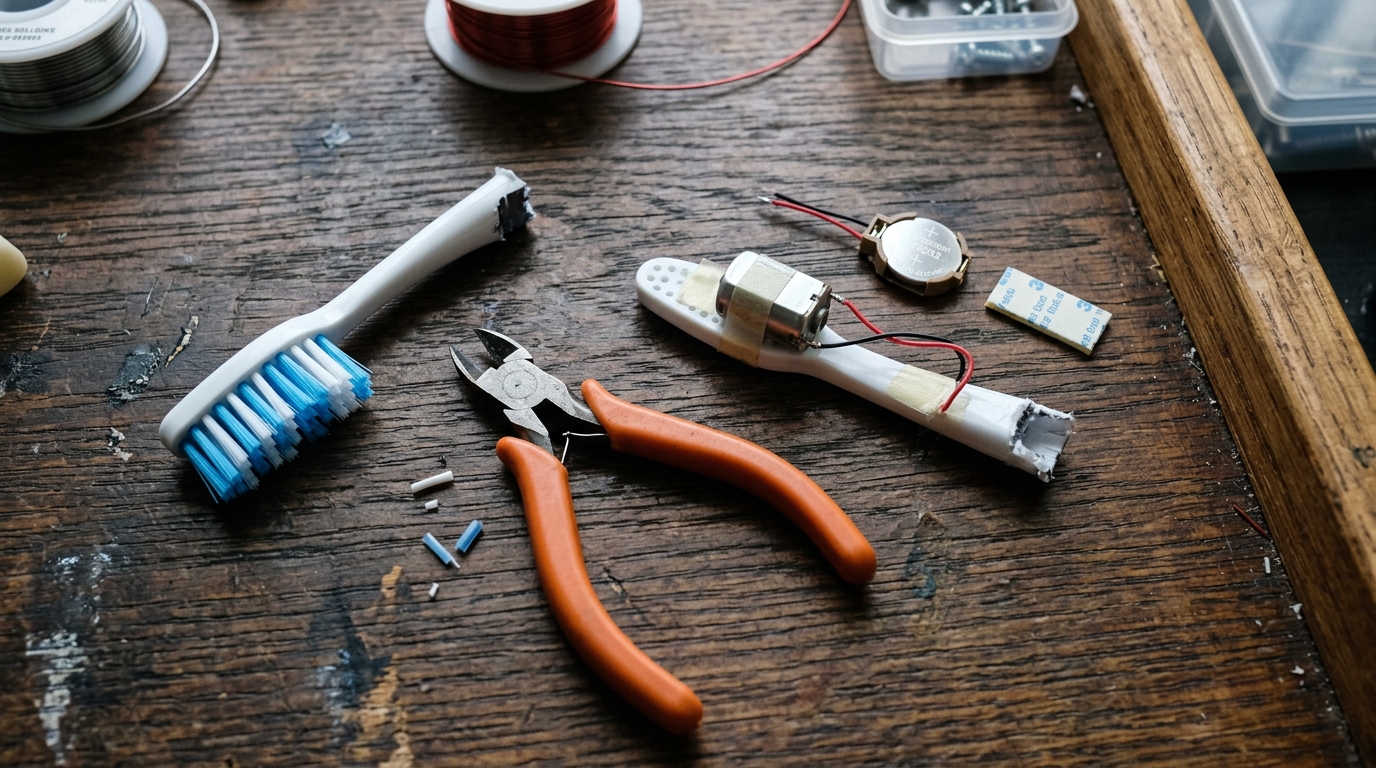
- Inspect the bristles carefully: make sure all bristles angle backward toward the rear of the head at ~15° to 25° from vertical.
- Wipe the flat plastic top of the toothbrush with isopropyl rubbing alcohol to remove grease and ensure strong foam tape adhesion.
- Check that the bottom bristle plane is flat and level so all bristles contact the table evenly.
Mounting the Vibration Motor & Foam Tape
Cut a rectangular piece of heavy-duty double-sided foam tape and press it firmly onto the top plastic back of the toothbrush head. Mount the 3V coin vibration motor onto the tape.
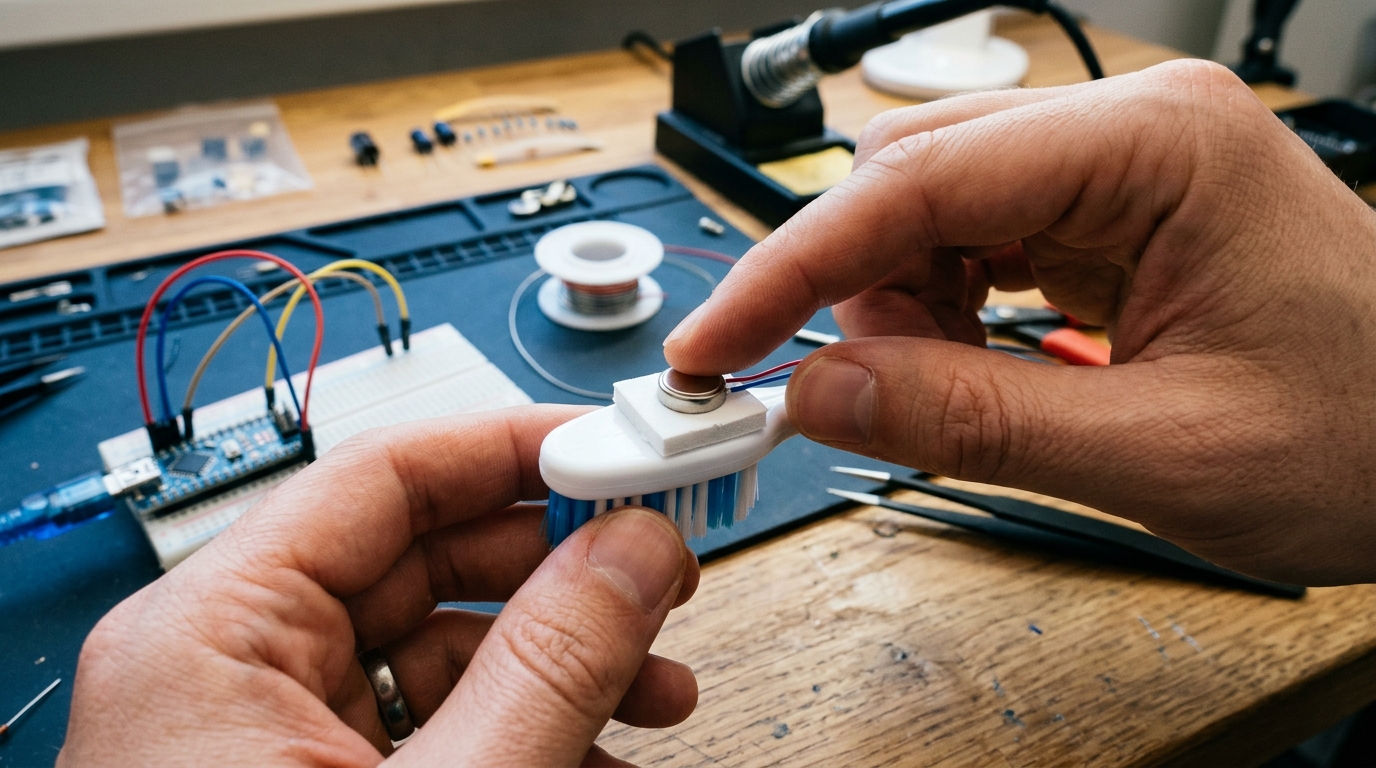
- Strip 5mm of insulation from the negative (blue/black) motor lead and lay the exposed copper across the tape.
- Press the vibrating motor firmly into the front half of the foam tape.
- Ensure the rotating eccentric mass disc has complete clearance and does not rub against the tape or plastic edges.
Connecting 3V Coin Battery & Balancing Center of Gravity
Press the CR2032 coin battery firmly onto the foam tape (negative side down touching the stripped blue lead). Touch the positive red motor lead to the top surface to start motion.
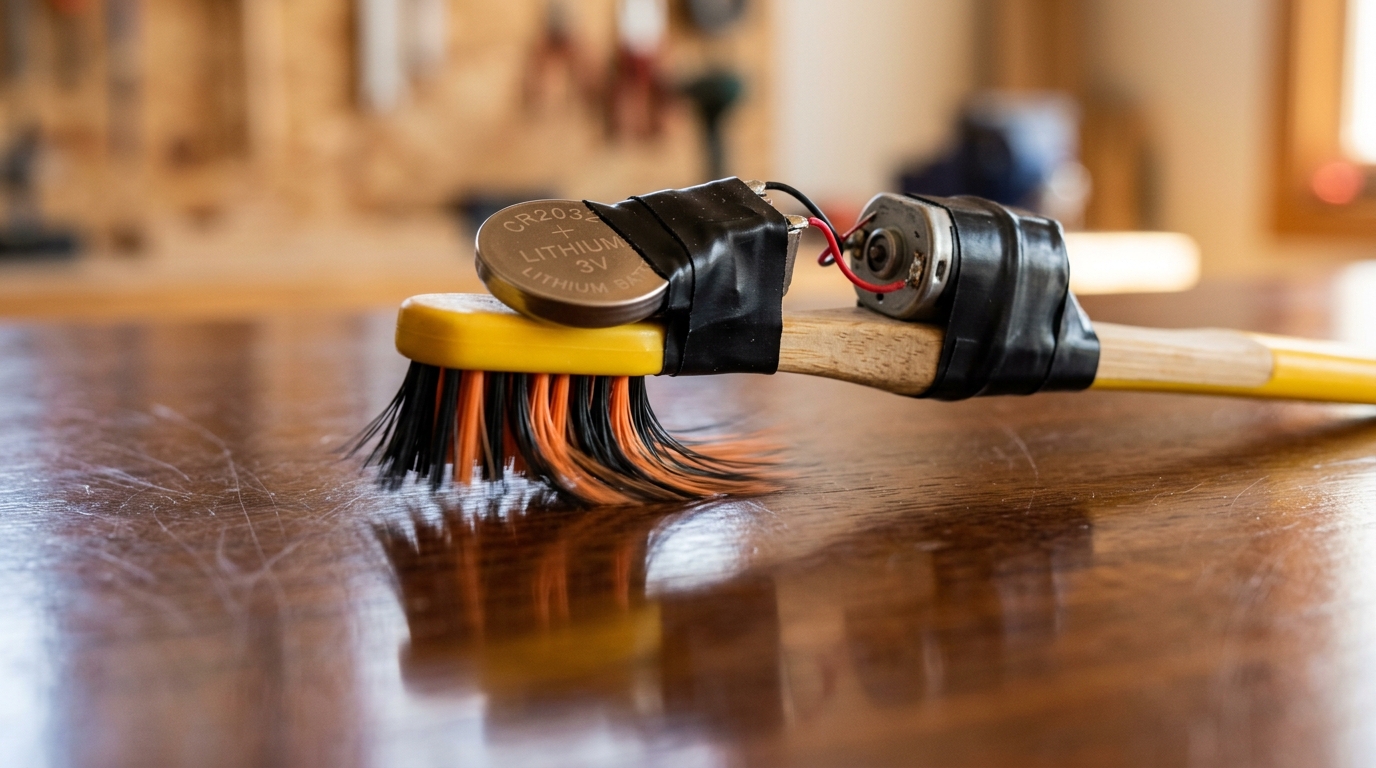
- Secure the red positive motor wire to the top positive terminal with a small strip of electrical tape.
- Place the BristleBot on a smooth, flat table or tray and observe its motion.
- If it leans left or right, gently shift the battery position by 1mm to center the mass above the bristle core.
- Optional: Add miniature googly eyes or two wire paperclip antennae for fun personality!